

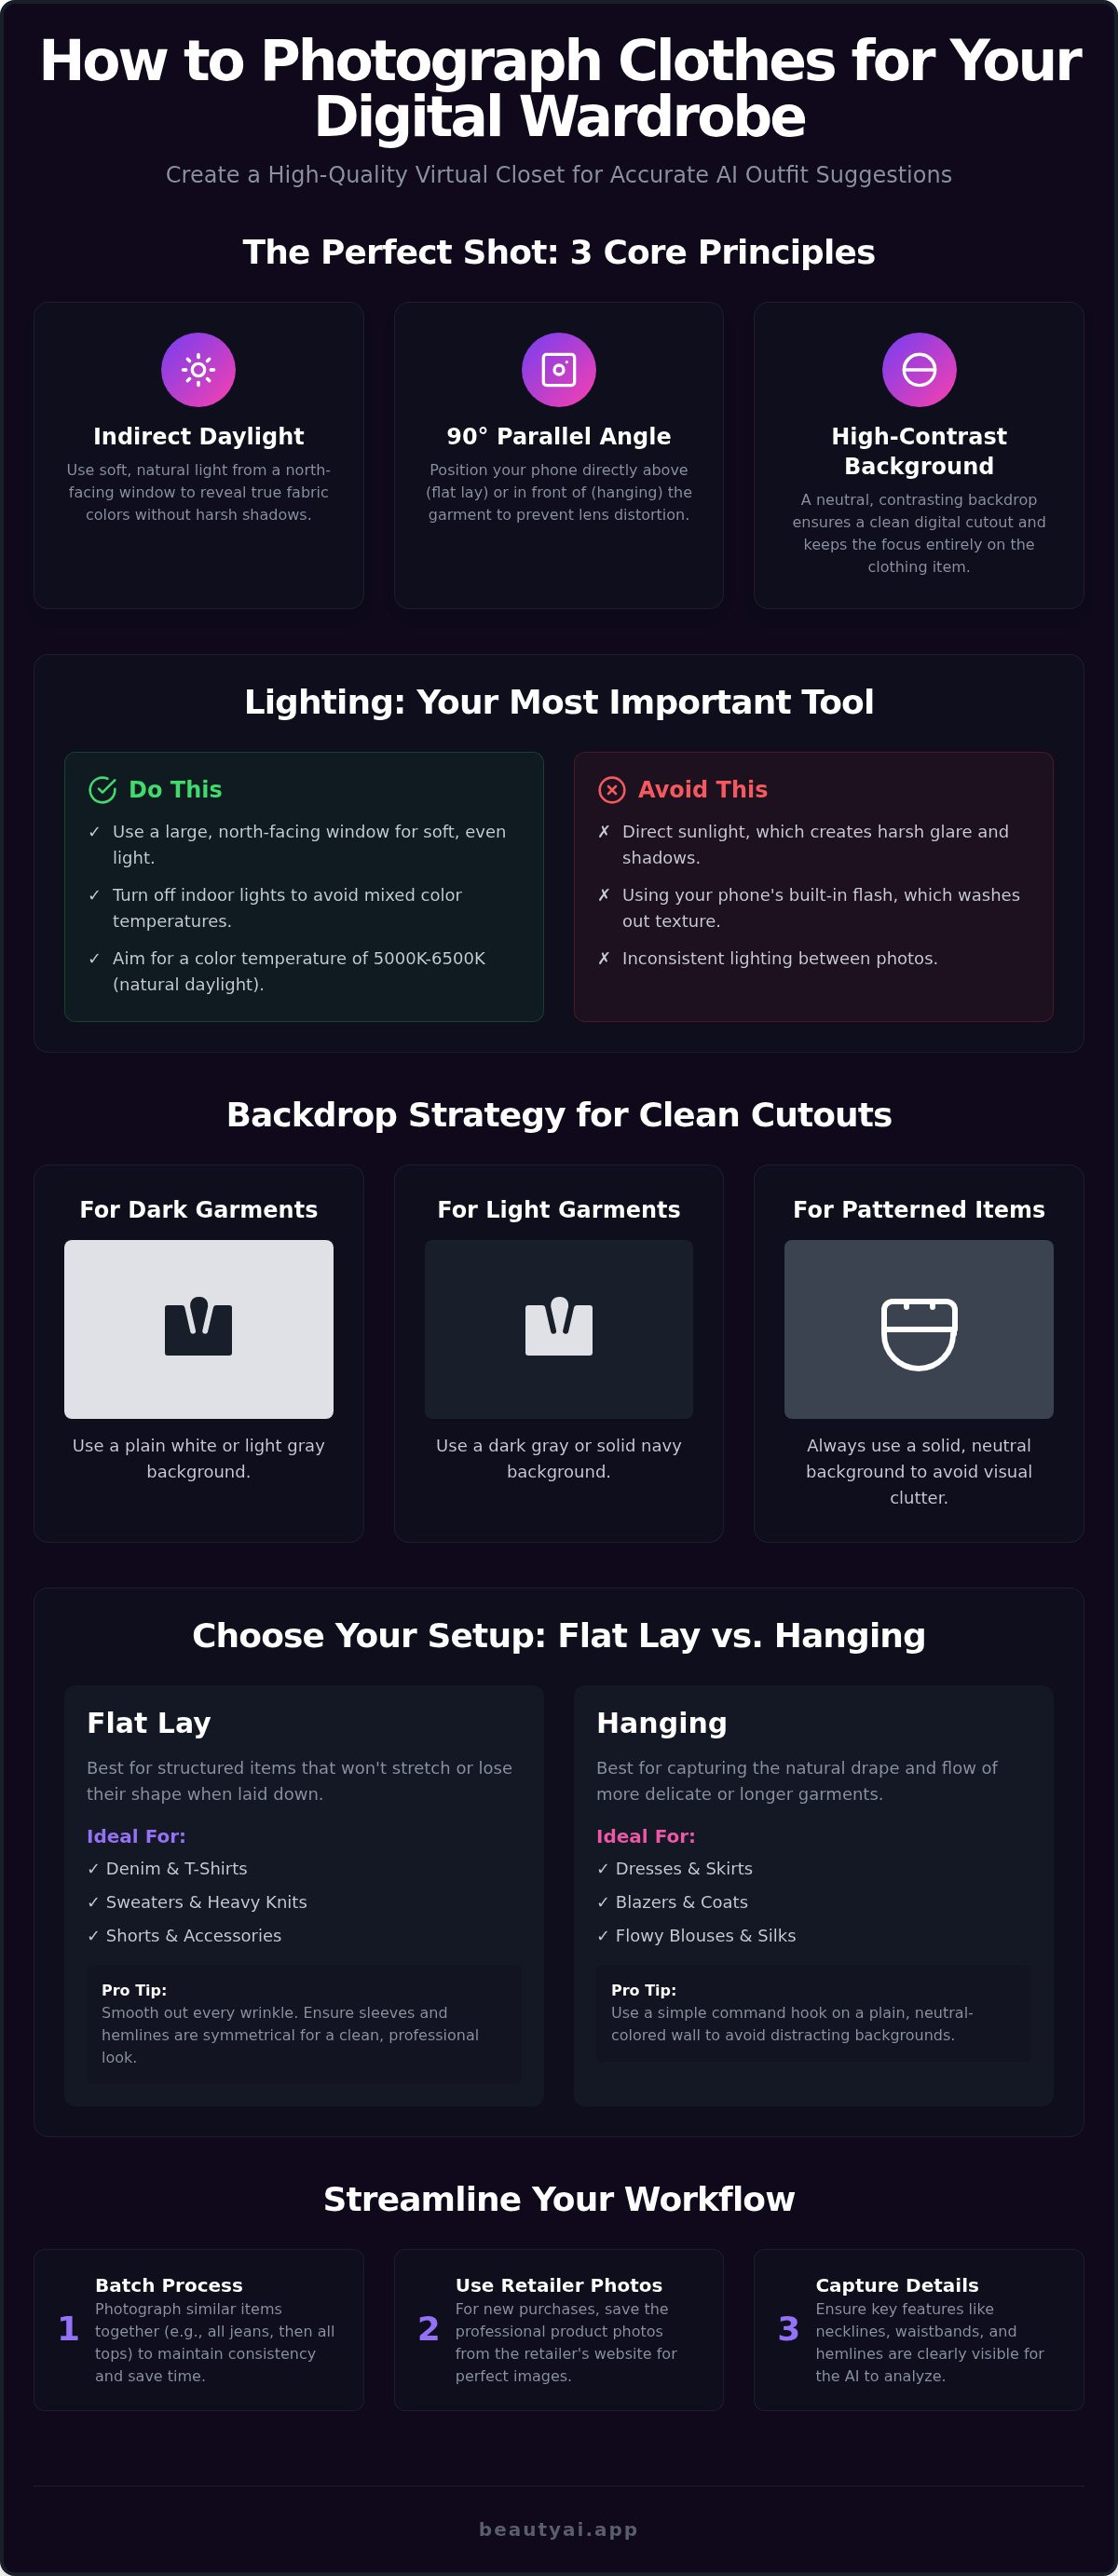
What if the reason your AI stylist keeps suggesting mismatched colors isn't the technology, but the quality of your source photos? To learn how to photograph clothes for a wardrobe app effectively, you must prioritize lighting and contrast. Position your garment on a neutral, high-contrast surface, like a white sheet for a navy blazer, under indirect natural light. This ensures the AI captures true fabric textures, such as the distinct weave of cream chinos or the subtle sheen of a silk scarf. Use a 90-degree parallel phone angle for flat lays to prevent lens distortion.
| Element | Best Practice |
|---|---|
| Light | Indirect Daylight |
| Angle | 90° Parallel |
| Backdrop | High Contrast |
We often feel that building a digital closet is an overwhelming task; however, a methodical setup ensures each upload is a one-time investment. This guide provides the specific photography techniques required to create a high-quality digital closet that powers accurate AI style suggestions. You'll learn how to optimize lighting, choose the right backdrops, and master angles for a professional result.
Key Takeaways
- Learn how to photograph clothes for a wardrobe app by matching your setup to the fabric type, ensuring digital items maintain their real-world shape and texture.
- Use indirect natural light from a north-facing window and a neutral, high-contrast background to prevent color distortion and ensure clean background removal.
- Capture specific details such as necklines and waistbands to help AI features accurately analyze proportions for better outfit suggestions.
- Streamline your workflow by batching similar garments together or utilizing retailer screenshots to build a professional-looking digital closet with minimal effort.
Table of Contents
Optimizing Your Environment: Lighting and Background Essentials
Capturing clear images is the foundation of a functional virtual closet. To learn how to photograph clothes for a wardrobe app effectively, start by locating the best natural light source in your home. A large, north-facing window is ideal. It provides soft, indirect light that reveals true fabric colors without creating harsh shadows. Avoid direct sunlight; it creates high-contrast glare that confuses image sensors and obscures fine details.
Position your phone parallel to the garment rather than at an angle. This alignment prevents lens distortion, ensuring that a midi skirt doesn't look like a mini skirt in your digital library. Keep your lighting consistent by turning off overhead lamps. Mixed lighting, such as warm interior bulbs clashing with cool daylight, causes color cast issues that make the garment look different on screen than in real life.
The Role of Color Temperature in AI Analysis
Accurate color analysis apps require light within the 5000K to 6500K range, which mimics natural daylight. This specific temperature range ensures that the AI correctly identifies subtle shifts in hue, such as distinguishing navy from black. Don't use your phone's flash. While professional Fashion photography often utilizes strobe setups, your smartphone flash creates artificial highlights that wash out fabric textures and ruin the AI's ability to "see" the garment's shape.
Choosing the Right Backdrop
Use a neutral, high-contrast background to help your digital wardrobe app remove backgrounds cleanly. High contrast is the secret to a sharp digital cutout. Follow these simple rules for contrast:
- Dark garments: Use a plain white or light gray sheet.
- Light garments: Use a dark gray or navy backdrop.
- Patterned items: Stick to a solid, neutral background to avoid visual clutter.
Consistent backdrops create a cohesive visual grid. This makes your digital closet feel like a professional catalog rather than a random collection of snapshots.
Mastering the Setup: Flat Lay vs. Hanging Techniques
Choosing the correct physical orientation ensures your garments retain their natural shape on screen. When you learn how to photograph clothes for a wardrobe app, you'll discover that structure determines the method. Durable items like denim, cotton t-shirts, and heavy wool knits are ideal for flat lays. This horizontal approach provides a stable base to capture the full dimensions of your most resilient pieces without worrying about gravity-induced stretching.
When to Use Flat Lays
Clear a space on a clean table near your light source. Lay the item flat and ensure the sleeves and hemline are symmetrical. Use small weights or double-sided tape tucked inside the fabric to keep thin straps or collars in place. This prevents the sagging that occurs when light fabrics are laid down without support. A flat lay allows you to remain directly above the item, which minimizes perspective distortion.
The Benefits of Hanging Photos
Flowy fabrics, long dresses, and structured blazers often look lifeless when flat. Use a command hook on a plain wall to capture these items vertically. Hanging photos better represent the garment’s drape, which is essential for an accurate virtual try-on visualization. This vertical setup provides a realistic view of how the piece interacts with gravity and body proportions, making the digital version feel more authentic.
Standardize your distance by keeping your phone at a consistent height for every photo within a specific category. This uniformity helps the AI compare items accurately across your library. Smooth out every wrinkle before snapping the shutter. Much like when you photograph clothes for sale, visual presentation is paramount. Perfecting how to photograph clothes for a wardrobe app requires attention to these small details to avoid muddy digital renders in your closet.
Category-Specific Guidance: Capturing Detail for AI Recognition
Different garments require unique visual data points for the system to understand their function. When you refine how to photograph clothes for a wardrobe app, you must prioritize the specific features that define a garment's fit. For tops and blazers, focus on the neckline and shoulder structure. These areas serve as anchors for the AI to suggest accurate layering. For bottoms, ensure the waistband and hemline are clearly visible. This clarity helps the outfit generator app understand proportions, ensuring your digital outfits look balanced and intentional.
Capture the full length of dresses in a single frame. Avoid cropping the bottom of the skirt; if the AI can't see the hem, it might miscategorize a midi dress as a simple blouse. Maintaining the complete silhouette is the only way to ensure your digital library remains organized and functional.
Handling Patterns and Textures
Take a secondary close-up photo of complex patterns like herringbone or intricate florals if your app supports detail shots. High-resolution data prevents the AI from blurring fine lines into a solid color. Minimize glare on shiny fabrics like silk, satin, or leather by slightly adjusting your angle relative to the window. Soft, diffused light prevents the "white-out" effect that hides the rich texture of these materials. Precise texture capture is essential for realistic visual feedback.
Footwear and Bags
Stuff handbags with tissue paper or bubble wrap to reveal their true shape and volume. A flat, empty bag doesn't accurately represent how it looks when worn. When shooting shoes, photograph the pair together from a 45-degree angle. This specific perspective shows both the side profile and the top of the shoe, providing a comprehensive view for your visual grid. It creates a more professional look than a single shoe shot and ensures the AI recognizes the items as a matching set.
Efficient Cataloging: Batching Your Wardrobe for Faster Setup
Digitizing a full closet takes roughly 1.5 to 2 hours for 50 to 80 items when handled efficiently. Organize your efforts by category to maintain visual consistency across your library. Photograph all your t-shirts in one session, then move to trousers. This approach keeps your setup fixed. You won't need to adjust your phone height or lighting between every shot. If you're wondering how to photograph clothes for a wardrobe app without wasting time, this logical sequence is the most effective path forward.
Use the "Retailer Photo" shortcut for recent purchases. Screenshots from original orders provide high-quality images with professional lighting instantly. For older items, edit as you go. Quickly crop the frame or adjust the brightness before moving to the next piece. This prevents a massive backlog of post-processing work. Integrate this task into your daily habits. Photograph new purchases immediately before removing the tags to ensure your digital library stays current.
Creating a Workflow That Sticks
Don't try to digitize everything in one afternoon. Set a "10 items a day" challenge to prevent fatigue. This manageable pace allows you to focus on quality rather than speed. Start with your most-worn essentials. A capsule wardrobe app strategy works best when you prioritize the foundation of your style, such as your favorite blazer or reliable denim.
Final Quality Check
Perform a quick review after each batch. Look for "ghosting" or blurry edges where the background removal might have failed due to low contrast against your backdrop. Ensure the colors on screen match the real-world garment. Ready to see your closet in a new light? Download Beauty AI and start your digital wardrobe today.
Transform Your Personal Style Through Digital Organization
Mastering your environment by prioritizing indirect natural light and high-contrast backdrops is the most effective way to ensure your digital tools function with maximum efficiency. When you understand how to photograph clothes for a wardrobe app, you transform a simple photo gallery into a high-performance styling engine. Consistency in your setup, from the 90-degree phone angles for flat lays to ensuring fabrics are wrinkle-free, allows the software to recognize silhouettes and textures with precision. This disciplined approach to cataloging removes the guesswork from your morning routine.
Viewing your closet through a digital lens provides a level of clarity that physical browsing simply can't match. High-quality inputs lead to accurate color analysis and seamless virtual try-on experiences with the garments you already own. This one-time investment in your photography process powers long-term styling success and AI-powered outfit planning that actually adapts to your lifestyle. Take the final step toward a more organized and intentional aesthetic by digitizing your most-worn essentials first. Start building your digital closet with Beauty AI today and experience the empowerment of a perfectly cataloged wardrobe.
Frequently Asked Questions
Do I need a professional camera to photograph my clothes?
You don't need a professional camera to learn how to photograph clothes for a wardrobe app; a modern smartphone is perfectly capable. Most phone cameras today feature high-resolution sensors and automatic processing that handle color balance well. Focus your efforts on securing a stable tripod and finding soft, indirect light. These factors contribute more to a high-quality digital library than expensive lenses or bulky DSLR equipment.
How do I fix the background if the app doesn’t remove it properly?
If your background isn't removing cleanly, the issue is likely a lack of contrast. Ensure your garment color stands out sharply against your backdrop, such as a black shirt against a white sheet. Check for harsh shadows around the edges of the fabric, as AI often misinterprets these as part of the item. Repositioning your light source to be more diffused often solves this technical friction immediately.
Can I use stock photos from the brand instead of taking my own?
Using retailer photos is an excellent shortcut for items you recently purchased online. These images already feature professional lighting and neutral backgrounds, which saves you significant cataloging time. Simply search your email for order confirmations or visit the brand's website to find the product listing. This method ensures your digital closet looks polished while maintaining the high level of visual detail required for accurate styling suggestions and virtual try-ons.
What is the best time of day to take photos of my wardrobe?
The best time to capture your wardrobe is mid-morning to early afternoon on a slightly overcast day. This window provides the most consistent, indirect natural light. Avoid shooting in the late evening, as artificial indoor lighting often introduces a yellow or orange tint that ruins color analysis accuracy. If the sun is too bright, use a sheer white curtain to diffuse the light and eliminate harsh glare.
How many photos do I need for each item of clothing?
One clear, front-facing photo is typically enough for most items in your digital closet. This single image should capture the full silhouette and true color of the garment. For pieces with complex textures or intricate patterns, you might add one secondary close-up shot. Limiting yourself to one primary photo per item keeps your cataloging process fast and ensures your digital wardrobe remains easy to browse and organize.


